Once your chatbot is set up, installing it is just pasting a small snippet into your website. Here's the code, the per-platform instructions, and how to check it works.
Option 1: Script (recommended)
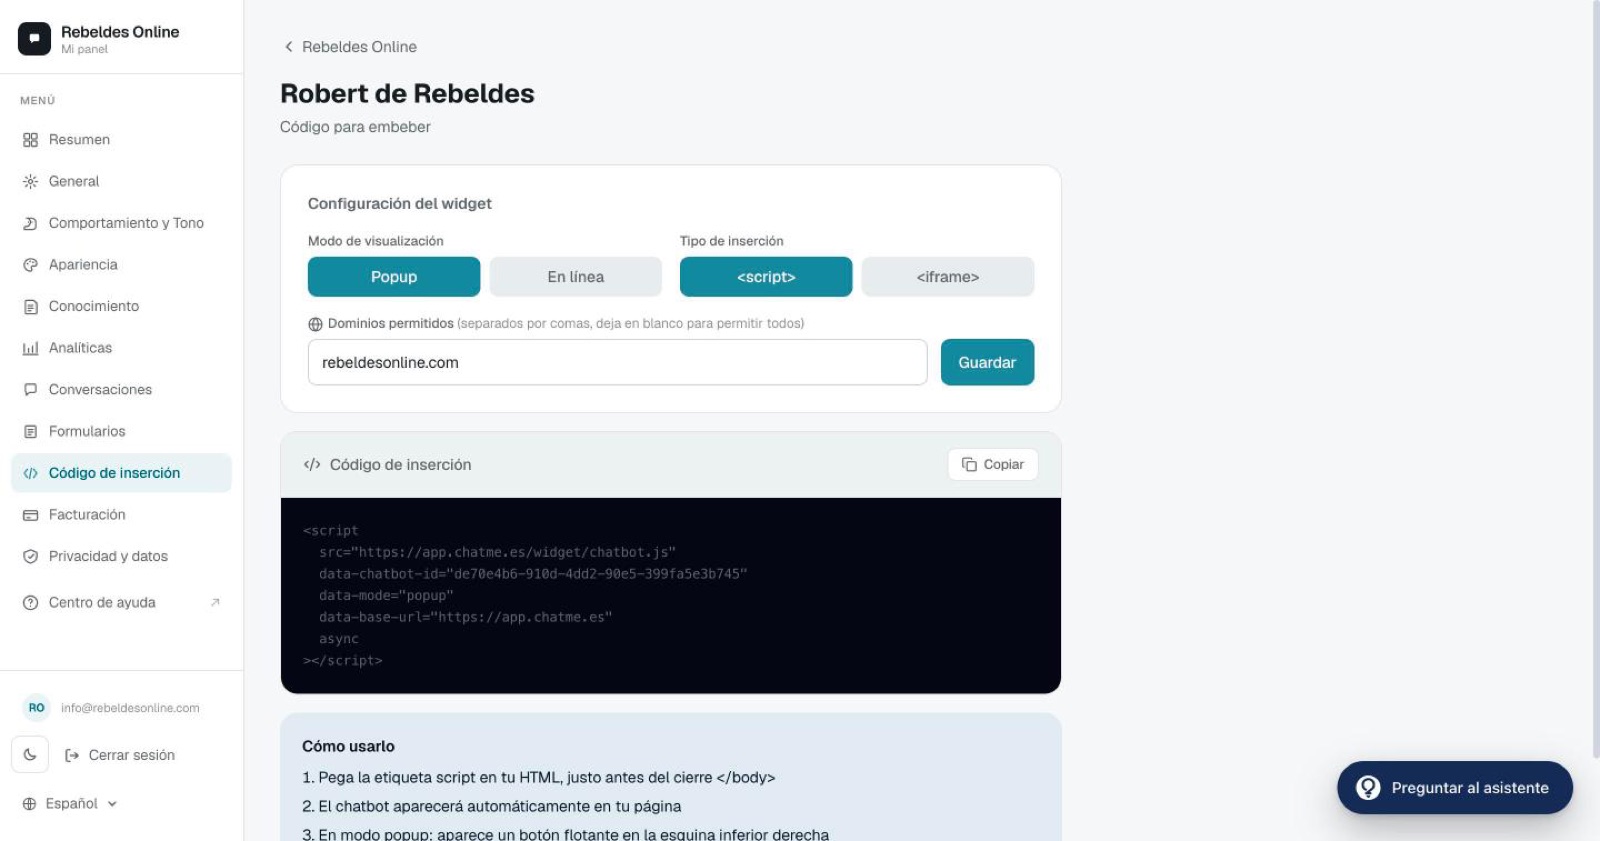
In the side menu go to Embed code and copy the script. It looks like this:
<script
  src="https://app.chatme.es/widget/chatbot.js"
  data-chatbot-id="YOUR_CHATBOT_ID"
  data-mode="popup"
  data-base-url="https://app.chatme.es"
></script>
Paste this just before the closing </body> tag on every page where you want the chatbot to appear.
Option 2: iframe
If your site blocks external scripts (some Shopify themes, for example), use the iframe:
<iframe
  src="https://app.chatme.es/widget/embed/YOUR_CHATBOT_ID"
  width="380"
  height="560"
  style="border:none;"
></iframe>
The iframe is self-contained and needs no extra configuration.
Per-platform instructions
On WordPress, avoid pasting it directly into footer.php — a theme update could overwrite it. Use a scripts plugin instead.
Allowed domains
By default the chatbot works on any domain. To limit it to your site (so nobody can copy your snippet onto another site), add your domains in Embed code → Allowed domains:
mybusiness.com, www.mybusiness.com, app.mybusiness.comLeave it blank to allow all domains.
Check that it works
- Open your site in the browser (avoid incognito to dodge cookie issues).
- Wait 2–3 seconds for the script to load.
- You'll see the floating bubble in the bottom corner (or wherever you set it).
- Click it, type a question and confirm it answers.
If the chatbot doesn't show
- Open the browser console (F12 → Console) and look for errors in red.
- Check the snippet is in
<body>and not in<head>. - Confirm the
data-chatbot-idis correct (copy it again from the dashboard). - If you restricted domains, make sure the current domain is on the list (including
www.if you use it). - Some cache plugins (W3 Total Cache, Cloudflare) can interfere — purge the cache after pasting the snippet.
Still not seeing it?
Open the ChatME Assistant in your dashboard and paste the console error — it'll help you diagnose it. You can also start with the getting-started guide if you haven't finished setting it up yet.
Ask the ChatME Assistant
It's in your dashboard and knows every step. Or book a demo and we'll set it up with you.
Start free